Pressure sensor with antistatic foam
Introduction
Pressure Sensor with antistatic foam
Here we are building our own pressure sensor out of antistatic foam, 2 pennies and some electrical tape.
Components Needed
- Freeduino or Arduino or clone
- USB cable for Freeduino
- Freeduino development software - download here!
- Solderless Breadboard
- Hookup wire 22gauge solid
- 2 pennies
- some sandpaper
- 1 sq in of antistatic foam (used to pack chips - the black stuff!)
- 1 resistor 1K to 10K
- electrical tape
How to
- Use the sandpaper to make your pennies shine bright copper
- Solder a 8" wire to each penny - This is kind of difficult, you will need to heat up the penny and use lots of solder. Make sure the wire is stuck on well.
- Sandwich the antistatic foam between the pennies
- Wrap with some electrical tape
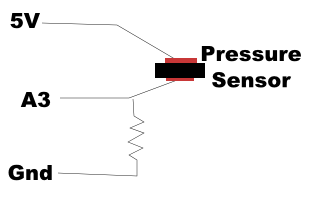
- The thing you just made is a pressure sensor and it works like a resistor. Use it in a voltage divider circuit (like the light sensor and the thermistor) to measure the pressure when you squeeze the two pennies together.
- Connect like the schematic below to Arduino pin analog 3 (A3)
- Copy and paste the code and run
Pictures
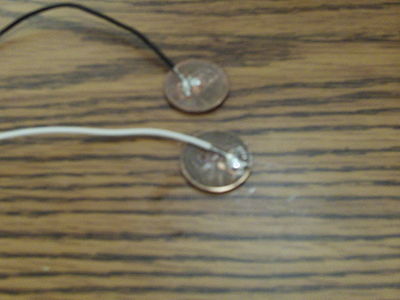
sorry about the poor picture. I forgot to put the camera in macro mode! This is a pic of the wires soldered to the pennies. Use sandpaper to shine up where you solder.
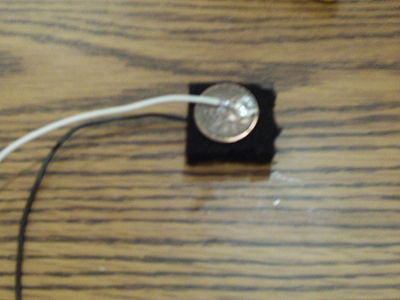
Sandwich the black foam between the pennies.
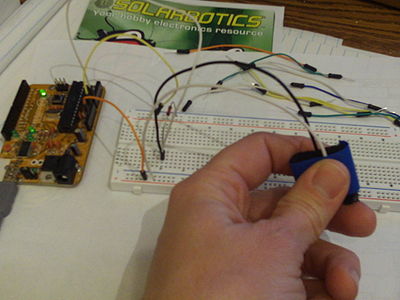
Circuit breadboarded and being tested. Squeeze the foam to change the resistance between the pennies.
Schematic
Code
First, you can test this circuit easily without a LCD screen using the example arduino script "AnalongInSerial" Upload and run the script. Then turn on the serial monitor in the Arduino IDE (ctrl+shift+M) and squeeze the pressure sensor!
//This code builds upon Inning 5 by
//showing the value of a pot on analog 0
//bpw 5/11/10
//modified for pressure sensor 2/11/11


// include the library code:
#include <LiquidCrystal.h>

// initialize the library with the numbers of the interface pins
LiquidCrystal lcd(7, 8, 9, 10, 11, 12);

int inPin = 2;   // choose the input pin (for a pushbutton)
int val = 0;     // variable for reading the pin status

int potpin = 0;  // analog pin 0
int potval = 0;     // variable for reading the pin status

int pcpin = 1;  // analog pin 1 - photocell
int pcval = 0;     // variable for reading the pin status

int thpin = 2;  // analog pin 2 - thermistor
int thval = 0;     // variable for reading the pin status

int prpin = 3;  // analog pin 3 - pressure
int prval = 0;     // variable for reading the pin status

void setup() {
  // set up the LCD's number of rows and columns:
  lcd.begin(16, 2);
  // Print a message to the LCD.
  //lcd.print("hello, world!");

  pinMode(inPin, INPUT);    // declare pushbutton as input
  digitalWrite(inPin,HIGH);  //engages internal pullup resistor

}

void loop() {
  // set the cursor to column 0, line 1
  // (note: line 1 is the second row, since counting begins with 0):
  lcd.clear();
  lcd.setCursor(0, 1);
  // print the number of seconds since reset:
  lcd.print(millis()/1000);

  //code for button pressed!
  val = digitalRead(inPin);  // read input value
  if (val == LOW) {         // check if the input is HIGH (button released)
    lcd.print(" DOWN");
  } else {
    lcd.print(" UP  ");
  }
  //read the pot - values are 0..1023
  lcd.print(" PR: ");
  prval = analogRead(prpin);    // read the value from the (center lead of ) potentiometer connected to potpin
  lcd.print(prval);

  //read the photocell - values are 0..1023
  lcd.setCursor(0, 0);  //col 12, row 1
  lcd.print("PC:");
  pcval = analogRead(pcpin);    // read the value from the photocell circuit
  lcd.print(pcval);

    //read the thermistor - values are 0..1023
  lcd.print("  Th:");
  thval = analogRead(thpin);    // read the value from the thermistor circuit
  lcd.print(thval);

 delay(50);
}
Troubleshooting
Are your pennies soldered well?
Can you measure resistance changes using a multimeter?
Are power and ground set up correctly?
Double check the schematic.


