5th Inning
Introduction
Pushbutton Switches
Components Needed
- Freeduino or Arduino or clone
- USB cable for Freeduino
- Freeduino development software - download here!
- Solderless Breadboard
- Hookup wire 22gauge solid
- Pushbutton Switch
- Soldering Iron and Solder to solder wires to switch
- 1 kOhm resistor (Brown-Black-Red)
How to
- For our workshop, you will have to solder some hookup wire to one of your pushbutton switches. Just strip back a half an inch of wire or so, stick it through the hole on the switch lead and solder. You will have help. It is easy.
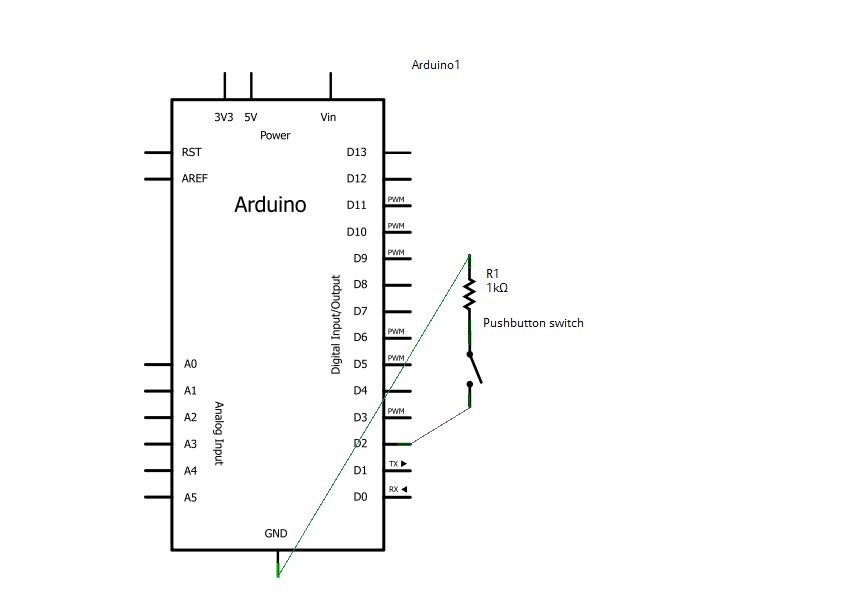
- Follow the fritzing diagram and hook up the circuit.
- Cut and paste your code and run!
Schematic
Fritzing
Code
Cut and paste into your Arduino code environment. This code will light the LED connected to pin 13 when the button is pushed. If you removed the led from Inning 2, do not worry, pin 13 has a soldered on LED on most Arduinos and clones.
/* Basic Digital Read
 * ------------------
 *
 * turns on and off a light emitting diode(LED) connected to digital
 * pin 13, when pressing a pushbutton attached to pin 12. It illustrates the
 * concept of Active-Low, which consists in connecting buttons using a
 * 1K to 10K pull-up resistor.
 *
 * Created 1 December 2005
 * copyleft 2005 DojoDave <http://www.0j0.org>
 * http://arduino.berlios.de
 *
 */

int ledPin = 13; // choose the pin for the LED
int inPin = 12;   // choose the input pin (for a pushbutton)
int val = 0;     // variable for reading the pin status

void setup() {
  pinMode(ledPin, OUTPUT);  // declare LED as output
  pinMode(inPin, INPUT);    // declare pushbutton as input
}

void loop(){
  val = digitalRead(inPin);  // read input value
  if (val == HIGH) {         // check if the input is HIGH (button released)
    digitalWrite(ledPin, LOW);  // turn LED OFF
  } else {
    digitalWrite(ledPin, HIGH);  // turn LED ON
  }
}
Troubleshooting
Resources
See this link for more information.

