4th Inning
Jump to navigation
Jump to search
Contents
Introduction
LCD display
Components Needed
- Freeduino or Arduino or clone
- USB cable for Freeduino
- Freeduino development software - download here!
- Solderless Breadboard
- Hookup wire 22gauge solid
- LCD display
- Potentiometer
How to
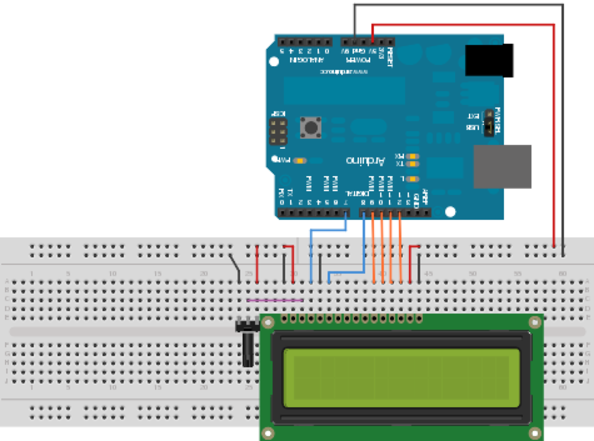
There are 16 pins on the LCD numbered 1 to 16 going left to right in the breadboard picture shown below. The 5V pin on the arduino supplies the power for the backlight and the logic of the LCD display. In the breadboard picture all the wires that carry 5V are red and all the wires connected to ground are black.
Step 1
Connect the 5V and ground from the adruino to the power bus on the breadboard.
The upper two rows in the breadboard form the power bus. All the holes on the first row are connected together under the board. Likewise, all the holes on the second row are connected together under the board.
Schematic
Fritzing
Breadboard:
