File Server: Difference between revisions
Jump to navigation
Jump to search
Notyou007a (talk | contribs) No edit summary |
No edit summary |
||
| (One intermediate revision by one other user not shown) | |||
| Line 5: | Line 5: | ||
|contact=Aaron V. | |contact=Aaron V. | ||
|where=next to Member Storage | |where=next to Member Storage | ||
|picture= | |picture=LVL1Network.jpg}}<br> | ||
=Basic Info= | =Basic Info= | ||
| Line 97: | Line 97: | ||
* moves infected files to /home/lvl1/infected/ | * moves infected files to /home/lvl1/infected/ | ||
* logs to /var/log/clamav.log | * logs to /var/log/clamav.log | ||
=CloneZilla= | |||
This is the process for backing up computers to the file server. | |||
* Boot a clonezilla iso | |||
* Clonezilla Live | |||
* device-image | |||
* ssh_server | |||
* dhcp | |||
* 10.0.0.10 | |||
* 22 | |||
* lvl1 | |||
* /home/lvl1/images | |||
* yes (if it asks for ssh key) | |||
* Beginner | |||
* disk device | |||
* I lost track here... but you should be good. | |||
Latest revision as of 21:51, 3 December 2015

|
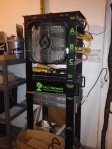
Equipment Overview
|
 |
Basic Info
- Web interface at http://files/
- Can also be accessed via samba/SMB with the standard lvl1 credentials.
- ssh is also possible, but there is no safety check for accidentally deleting files this way.
Setting up on Ubuntu
- Prerequisites:
sudo apt-get install autofs smbfs
- create autofs config files
- /etc/auto.master
/mnt /etc/auto.files --timeout=6000 --ghost
- /etc/auto.files
z -fstype=smbfs,credentials=/etc/auto.auth ://files/shared
- /etc/auto.auth
- (replace CENSORED with the lvl1 credentials)
username=CENSORED
password=CENSORED
- run the following:
sudo chmod 400 /etc/auto.auth
sudo service autofs restart
- the files share will be mounted in /mnt/z
- to make this easily accessible, run
ln -s /mnt/z ~/z
- Desktop file for adding to menu (place in /usr/share/applications/
[Desktop Entry]
Name=File Share
Comment=LVL1 central file server
Exec=nautilus /home/lvl1/z
Icon=system-file-manager
Terminal=false
Type=Application
StartupNotify=true
OnlyShowIn=GNOME;Unity;
Categories=GNOME;GTK;Utility;Core;
MimeType=inode/directory;application/x-gnome-saved-search;
X-GNOME-Bugzilla-Bugzilla=GNOME
X-GNOME-Bugzilla-Product=nautilus
X-GNOME-Bugzilla-Component=general
X-GNOME-Bugzilla-Version=3.4.2
Actions=Window;
X-Ubuntu-Gettext-Domain=nautilus

[Desktop Action Window]
Name=File Share
Exec=nautilus /home/lvl1/z
OnlyShowIn=Unity;
Server Setup
File Systems
Device
- Root is on a single drive. Important files are symlinked to the raid array.
- Raid device is /dev/md0
- Do not access this directly
- Check status with
cat /proc/mdstat
- Cache device is /dev/bcache0
- This adds SSD caching on top of the /dev/md0
- Interact with /dev/bcache0 as if it were a disk.
- Mounted on /mnt/bcache0
Samba
- Samba is used to share files and provide a recycling mechanism
- Services like elFinder that access member files use a mounted samba share so that samba can protect files from being deleted
- Config file: /etc/samba/smb.conf
Autofs
- Used to mount the samba share locally
- Config files
- /etc/auto.master
- /etc/auto.files
- /etc/auto.files.auth
- Dir
- /mnt/autofs/z
ClamAV
- Virus scanner
- Currently I only have a cronjob setup to manually scan the shared directory
- cronjob /etc/cron.hourly/clamav
- scans /home/lvl1/shared/
- moves infected files to /home/lvl1/infected/
- logs to /var/log/clamav.log
CloneZilla
This is the process for backing up computers to the file server.
- Boot a clonezilla iso
- Clonezilla Live
- device-image
- ssh_server
- dhcp
- 10.0.0.10
- 22
- lvl1
- /home/lvl1/images
- yes (if it asks for ssh key)
- Beginner
- disk device
- I lost track here... but you should be good.