Alpha Spark Detector: Difference between revisions
| (31 intermediate revisions by one other user not shown) | |||
| Line 1: | Line 1: | ||
== Why == | == Why == | ||
Radiation is all around. And the Truely Mad Scientist's LVL1 Splinter Group wants to detect it all. For this build, the | Radiation is all around. And the Truely Mad Scientist's LVL1 Splinter Group wants to detect it all. For this build, the radiation being detected is alpha radiation. Alpha radiation consists of alpha particles ejected from a decaying atom. The particle consists of two protons and two neutrons. The particle is essentially a helium atom nuclei and carries a positive charge. The positive charge allows for its identification and detection. | ||
== The Build == | == The Build == | ||
===The Bill of Materials:=== | ===The Bill of Materials:=== | ||
* Single Row Header Pins (qty 2) | |||
* Single Row Header Pins | [[File:Tms_Header_Pins.jpg]] | ||
* Strip Board | * Strip Board | ||
[[File:Tms_Strip_Board.jpg]] | |||
* Acrylic Sheet (0.093, 0.22, 0.05 inches thicknesses) | * Acrylic Sheet (0.093, 0.22, 0.05 inches thicknesses) | ||
[[File:Tms_Acrylic_Sheets.jpg]] | |||
* Copper Sheet | * Copper Sheet | ||
[[File:Tms_Copper_Plate.jpg]] | |||
* 1 watt 10 Mega Ohm Resistor | |||
* 0.01 uf Ceramic Disc Capacitor 2kv rating (qty 2) | * 0.01 uf Ceramic Disc Capacitor 2kv rating (qty 2) | ||
* 1N4007 Diode (qty 12) | * 1N4007 Diode (qty 12) | ||
* | * Stirring Straws | ||
* Springs (qty 4) | |||
* Nuts and Bolts (qty 4 each) | |||
* Terminal Connector (Grounding Terminal for future modification) | |||
[[File:Tms_Alpha_Spark_Detector_Misc_Parts.jpg]] | |||
* Power Supply for CCFL Case MOD Lights | * Power Supply for CCFL Case MOD Lights | ||
* | [[File:Tms_CCFL_Power_Supply_Covered.jpg]] | ||
* Thin Copper Wire | |||
* Wire | * Wire | ||
* Super Glue | * Super Glue | ||
* Hot Glue | * Hot Glue | ||
| Line 50: | Line 56: | ||
This assembled diagram shows the straws, flattened by the wires, providing tension. | This assembled diagram shows the straws, flattened by the wires, providing tension. | ||
===Sensor Top Assembly=== | |||
[[File:Tms_Stripboard_Cut_w_Headers.jpg]] | [[File:Tms_Stripboard_Cut_w_Headers.jpg]] | ||
| Line 55: | Line 63: | ||
[[File:Tms_Stripboard_Cut_w_Headers_w_Leveling_Holes.jpg]] | [[File:Tms_Stripboard_Cut_w_Headers_w_Leveling_Holes.jpg]] | ||
[[File:Tms_Sensor_Top_Assembly_Top.jpg]] | |||
[[File:Tms_Sensor_Top_Assembly_Bottom.jpg]] | |||
===Sensor Bottom Assembly=== | |||
[[File:Tms_Copper_Plate_Build_1.jpg]] | [[File:Tms_Copper_Plate_Build_1.jpg]] | ||
| Line 61: | Line 72: | ||
[[File:Tms_Leveling_Plate.jpg]] | [[File:Tms_Leveling_Plate.jpg]] | ||
[[File:Tms_Sensor_Bottom_Assembly_Top.jpg]] | |||
[[File:Tms_Sensor_Bottom_Assembly_Side.jpg]] | |||
[[File:Tms_Sensor_Bottom_Assembly_Bottom.jpg]] | |||
=== Sensor Complete Assembly=== | |||
[[File:Tms_Completed_Sensor_Top.jpg]] | |||
[[File:Tms_Completed_Sensor_Bottom.jpg]] | |||
=== Voltage Multiplier === | === Voltage Multiplier === | ||
| Line 70: | Line 86: | ||
This voltage multiplier has eight stages and generates Negative high voltage. The capacitors are 0.01uf ceramice rated at 2kv. The circuit uses pairs of diodes in series to represent a single diode in the diagram. The circuit is soldered wire-to-wire on perf-board. | This voltage multiplier has eight stages and generates Negative high voltage. The capacitors are 0.01uf ceramice rated at 2kv. The circuit uses pairs of diodes in series to represent a single diode in the diagram. The circuit is soldered wire-to-wire on perf-board. | ||
[[File:Tms_Voltage_Multiplier_Top.jpg]] | |||
[[File:Tms_Voltage_Multiplier_Bottom.jpg]] | |||
=== Power Supply === | === Power Supply === | ||
The power supply used is a common Cold Cathode Fluorescent (ccfl) Tube driver used in computer case mods. The output is rated | The power supply used is a common Cold Cathode Fluorescent (ccfl) Tube driver used in computer case mods. The output is rated at 900 volts ac and can drive two CCFL tubes. | ||
[[File:Tms_CCFL_Power_Supply.jpg]] | |||
=== Wired Together === | === Wired Together === | ||
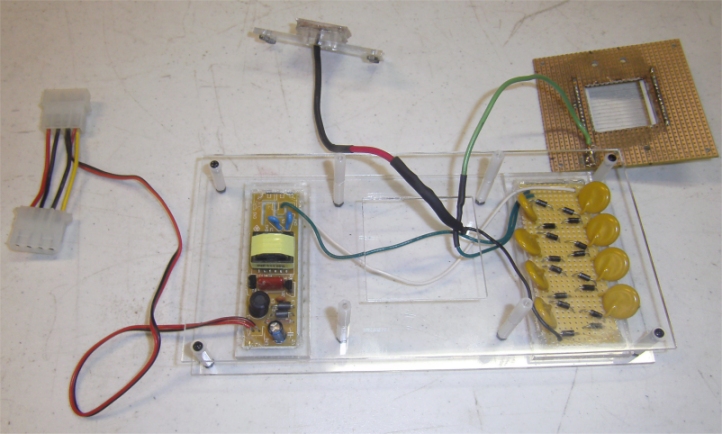
The detector is wired up as shown in the image below. A 10 mega ohm resistor is put in series with the Copper Plate and Voltage Multiplier. | |||
[[File:Tms_Detector_Layed_Out.jpg]] | |||
=== Housing === | === Housing === | ||
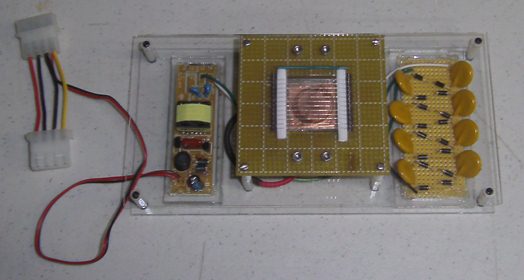
The final build is a three layer structure. | |||
[[File:Tms_ASD_Partial_Assembly.jpg]] | |||
[[File:Tms_Complete_Alpha_Spark_Detector.jpg]] | |||
== Operation == | == Operation == | ||
| Line 93: | Line 118: | ||
== Demo == | == Demo == | ||
[https://youtu.be/95oC63PhNJo YouTube Demo] | |||
== To The Index == | == To The Index == | ||
[http://wiki.lvl1.org/Truly_Mad_Scientist%27s_LVL1_Splinter_Group Splinter Group Index] | [http://wiki.lvl1.org/index.php?title=Truly_Mad_Scientist%27s_LVL1_Splinter_Group Splinter Group Index] | ||
[http://wiki.lvl1.org/index.php?title=Main_Page LVL1 Main Page] | |||
Latest revision as of 17:31, 11 February 2021
Why
Radiation is all around. And the Truely Mad Scientist's LVL1 Splinter Group wants to detect it all. For this build, the radiation being detected is alpha radiation. Alpha radiation consists of alpha particles ejected from a decaying atom. The particle consists of two protons and two neutrons. The particle is essentially a helium atom nuclei and carries a positive charge. The positive charge allows for its identification and detection.
The Build
The Bill of Materials:
- Single Row Header Pins (qty 2)
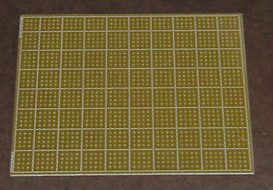
- Strip Board
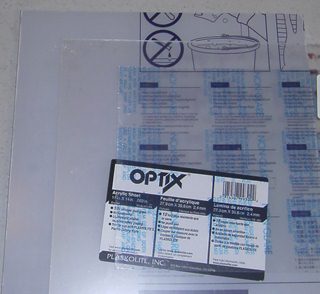
- Acrylic Sheet (0.093, 0.22, 0.05 inches thicknesses)
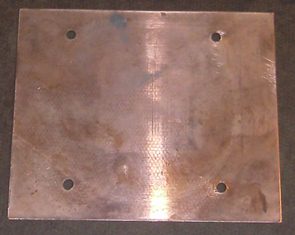
- Copper Sheet
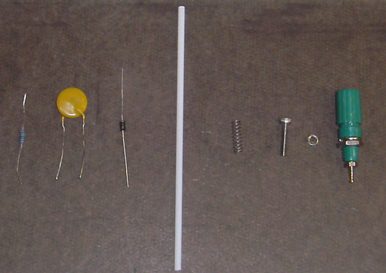
- 1 watt 10 Mega Ohm Resistor
- 0.01 uf Ceramic Disc Capacitor 2kv rating (qty 2)
- 1N4007 Diode (qty 12)
- Stirring Straws
- Springs (qty 4)
- Nuts and Bolts (qty 4 each)
- Terminal Connector (Grounding Terminal for future modification)
- Power Supply for CCFL Case MOD Lights
- Thin Copper Wire
- Wire
- Super Glue
- Hot Glue
The Components:
- Sensor Assembly
- Voltage Multiplier
- Power Supply
- Housing
Assembly
Sensor Assembly
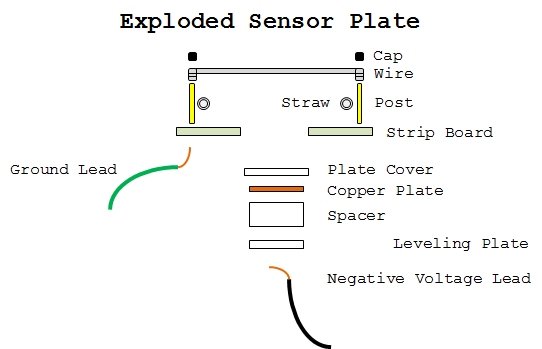
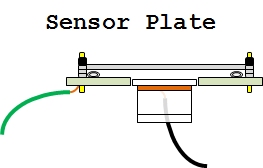
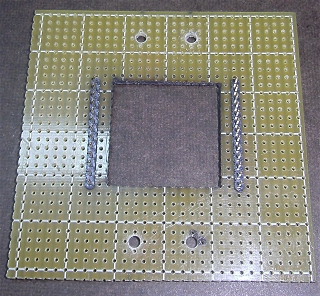
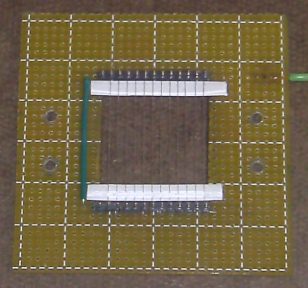
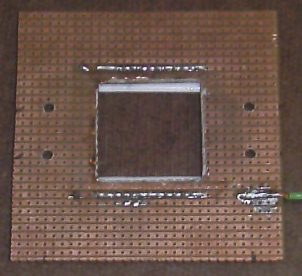
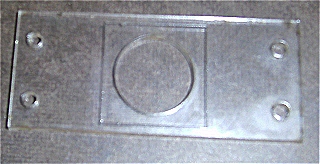
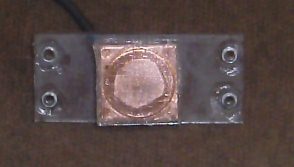
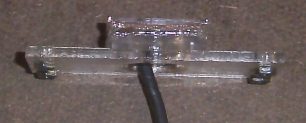
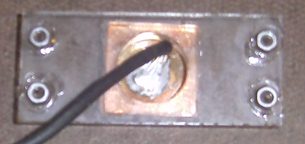
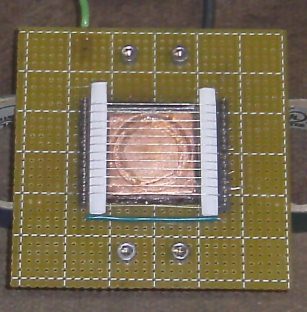
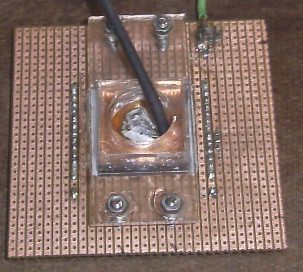
The Sensor Plate illustrated above is assembled in layers. The top layer consists of header pin spacers which are used to hold the sensor wires inplace. The sensor wires are wirewrapped to rows of header pin posts. Below the wires are straws which will tension the wire when assembled. This wire assembly is soldered onto a strip board with a square cut out of the center to allow the bottom elements to be adjusted in height and leveling. The bottom assembly begins with a Cover Plate designed to shield the Copper Plate's corner which collect charge and interfer with the operation. The Copper Plate is mounted on a Spacer with a through hole to allow the Negative Voltage Wire to be attached. The Leveling Plate also has an access hole for the Negative Voltage Wire and serves as the mounting for the bottom assembly. Finally, the Negative Voltage wire is soldered to the Copper Plate and the Ground Wire is soldered to the header pin posts. Not visible in the diagram are the four leveling screws through the Strip Board and fastened to the Leveling Plate with springs in between. A wire is also used to jumper/connect the two rows of header pin posts.
This assembled diagram shows the straws, flattened by the wires, providing tension.
Sensor Top Assembly
Sensor Bottom Assembly
Sensor Complete Assembly
Voltage Multiplier
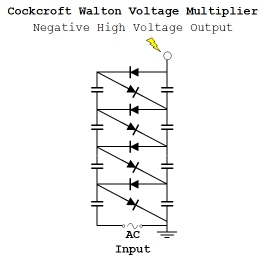
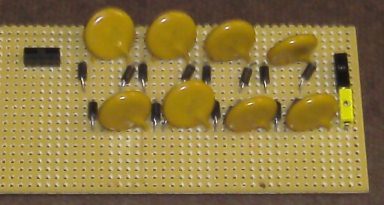
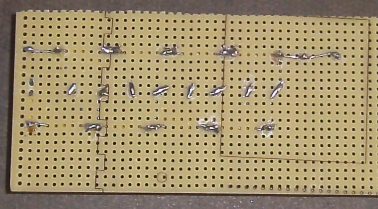
This voltage multiplier has eight stages and generates Negative high voltage. The capacitors are 0.01uf ceramice rated at 2kv. The circuit uses pairs of diodes in series to represent a single diode in the diagram. The circuit is soldered wire-to-wire on perf-board.
Power Supply
The power supply used is a common Cold Cathode Fluorescent (ccfl) Tube driver used in computer case mods. The output is rated at 900 volts ac and can drive two CCFL tubes.
Wired Together
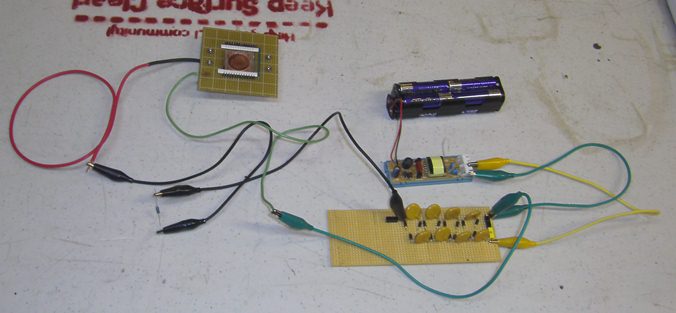
The detector is wired up as shown in the image below. A 10 mega ohm resistor is put in series with the Copper Plate and Voltage Multiplier.
Housing
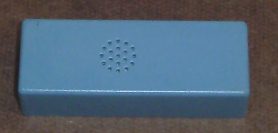
The final build is a three layer structure.
Operation
After the detector is powered on, it maybe necessary to adjust the distance between the Copper Plate and Overhead Wires. The leveling Screws are turned until any arcing between the copper plate and wires stops. The seperation is intended to be the minimum distance that does NOT arc on its own.
Once adjustments are made, an alpha emitter sample is placed above the Sensing Wires with the direction of alpha emmision directed toward the Sensing Wires and Copper Plate. When an alpha source is present, a spark jumps between the Sensing Wires and Copper Plate. The stronger the source, the more sparks are generated. The arcing should generate an audible snapping sound.
If a known alpha source does not generate the sparks then it maybe necessary to adjust the distance between the Sensing Wires and Copper Plate. Adjust the Leveling Screws to reduce the distance but not enough to allow spontaneous sparking in the sensor.

