Difference between revisions of "ED-209"
Jump to navigation
Jump to search
| Line 34: | Line 34: | ||
* Click Prepare to Print to generate gcode | * Click Prepare to Print to generate gcode | ||
[[File:Preview.png]] | [[File:Preview.png]] | ||
| + | * Drag the End slider back and forth if you want a quick overview of the part printing | ||
| + | * Put the material cost in the box so we can keep buying filament | ||
| + | * Click Save Toolpaths to Disk to save the gcode, preferably under Member Files in the file share (~/z/Member Files/) | ||
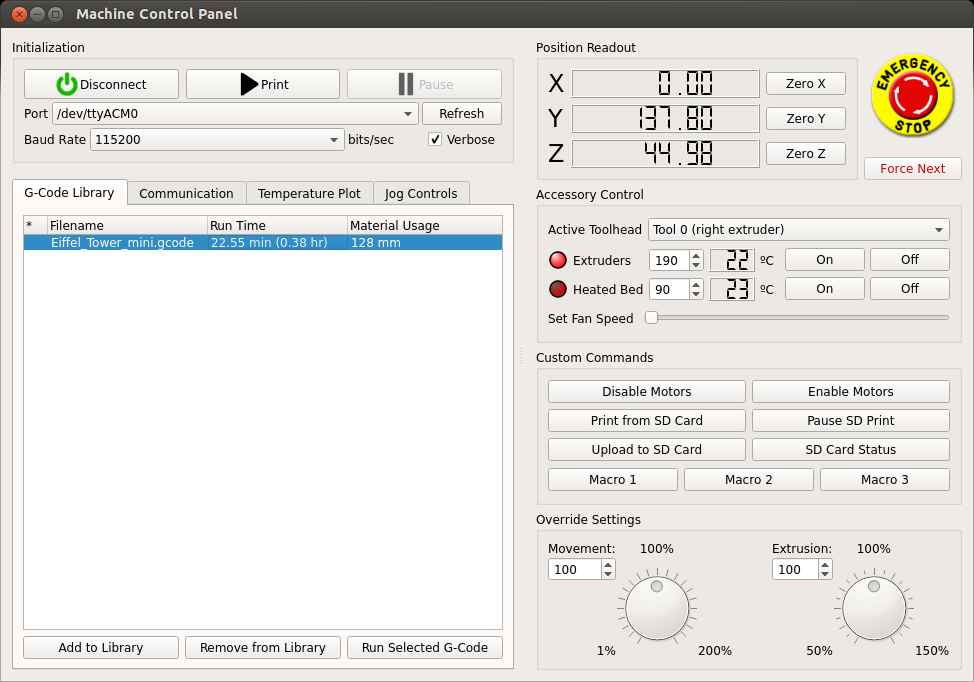
| + | * Now it's time to print. Click the gear icon on the right to launch the Machine Control Panel (or Ctrl-P or Tools -> Machine Control Panel) | ||
| + | [[File:Machinecontrolpanel.png]] | ||
| + | * Turn on the Lulzbot | ||
| + | * Select Port (should be ttyACM0 or ttyACM1) | ||
| + | ** Click refresh if it's not showing up | ||
| + | ** The custom names are not showing up in the new version of Simplify. | ||
| + | * Click Connect | ||
| + | * Click back to the G-Code Library tab | ||
| + | * Select the name of the file you just exported | ||
| + | * Click Run Selected G-Code | ||
==Maintenance Log== | ==Maintenance Log== | ||
* 04/18/2014 - Maintenance log created. | * 04/18/2014 - Maintenance log created. | ||
Revision as of 23:48, 2 May 2014
[Equipment|Back to list of Equipment]]

|
General
|
General Info
Information with downloadable user manual here
Ed uses 3mm filament.
How to use
- Simplify3D is on the 3D printer computer and configured for ED
- Launch Simply3D by clicking the following icon
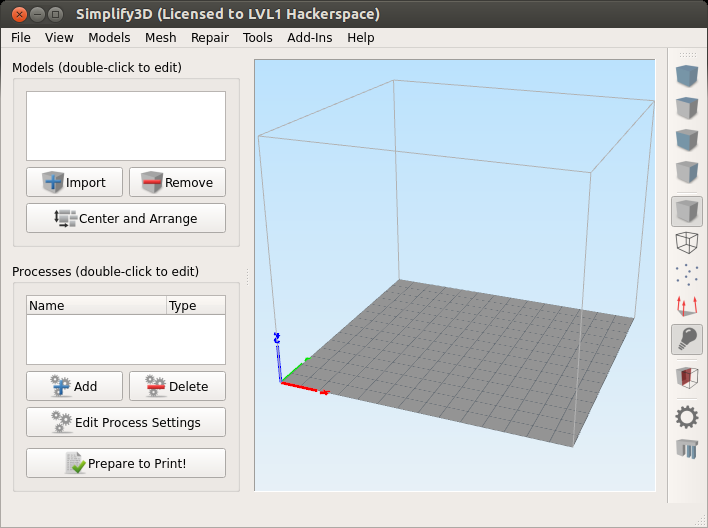
- Below is the Simplify3D interface
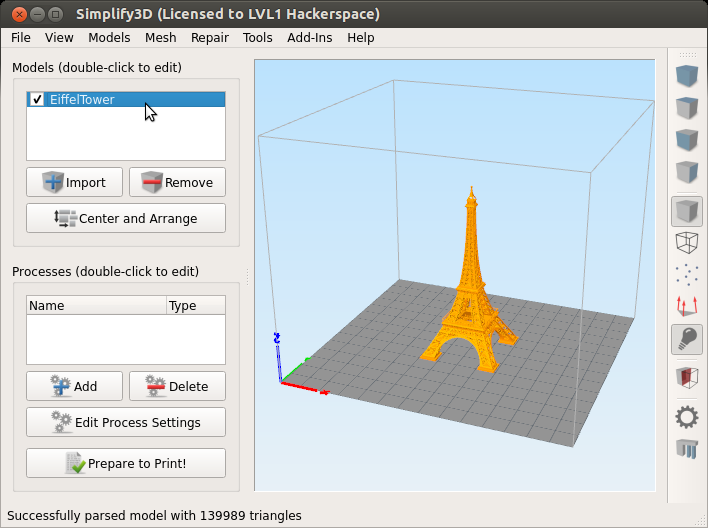
- Click Import under Models to add an STL file
- Don't have an STL file? Try Thingiverse
- If you want to edit the STL (scale, skew, etc) then double click on the name of the STL in the models box.
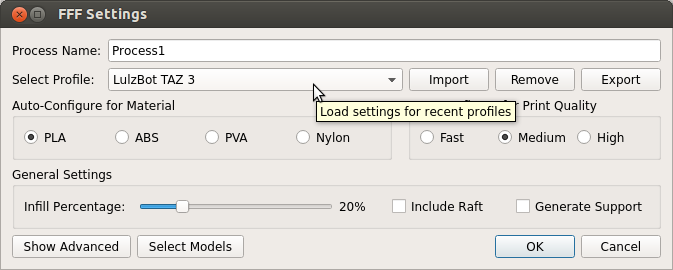
- Now that the STL is in Simplify3D, create a process by clicking Add under Processes.
- Make sure the LulzBot Taz 3 profile is selected and PLA as the material (ED is PLA only)
- If you change any of the advanced settings, please save them under a different name
- Click OK
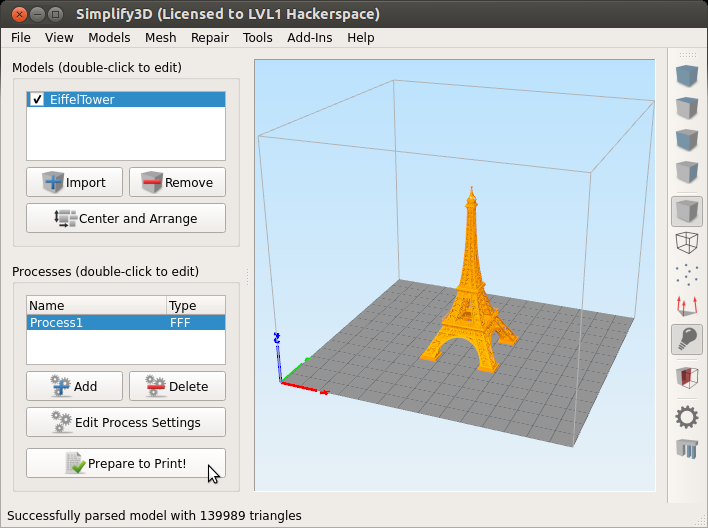
- Now we have an STL and a process
- Click Prepare to Print to generate gcode
- Drag the End slider back and forth if you want a quick overview of the part printing
- Put the material cost in the box so we can keep buying filament
- Click Save Toolpaths to Disk to save the gcode, preferably under Member Files in the file share (~/z/Member Files/)
- Now it's time to print. Click the gear icon on the right to launch the Machine Control Panel (or Ctrl-P or Tools -> Machine Control Panel)
- Turn on the Lulzbot
- Select Port (should be ttyACM0 or ttyACM1)
- Click refresh if it's not showing up
- The custom names are not showing up in the new version of Simplify.
- Click Connect
- Click back to the G-Code Library tab
- Select the name of the file you just exported
- Click Run Selected G-Code
Maintenance Log
- 04/18/2014 - Maintenance log created.

