Bridgeport Mill
[Equipment|Back to list of Equipment]]

|
General
|
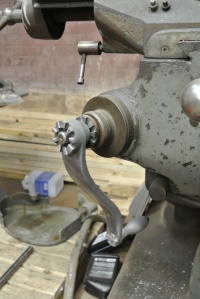
Generally used to machine flat surfaces, this mill can produce irregular surfaces, drill, bore, cut gears, and cut slots. This milling machine is a vertical spindle machine with a swiveling head.
How to Turn it On
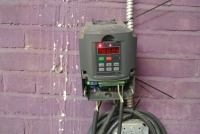
As of May 2019, the mill and the bridgeport lathe share a VFD, because we only have one. It's mounted in a metal enclosure on the wall in between the two pieces of equipment. Split-phase Power runs from the wall to the VFD, then the 3-phase runs from the VFD to a 3PDT switch on the wall. the center position of the switch is OFF, and the two side positions toggle power between the mill and the lathe. set the switch to the mill position to power the mill.
like before, this power goes into the reversing switch mounted to the mill body, so you'll need to select between the three positions of: Forward, Off, or Reverse on that switch as well to engage the motor.
Safety
- Eye wear is a must.
- Secure dangling and loose jewelry.
- Loose clothing and long hair should be appropriately secured from catching on the moving parts.
- Do not make contact with the revolving cutter.
- Place a wooden pad or suitable cover over the table surface to protect it from possible damage.
- Use the buddy system when moving heavy attachments.
- Do not attempt to tighten arbor nuts using machine power.
- When installing or removing milling cutters, always hold them with a rag to prevent cutting your hands.
- While setting up work, install the cutter last to avoid being cut.
- Never adjust the work piece or work mounting devices when the machine is operating
- Chips should be removed from the work piece with an appropriate rake and a brush.
- Shut the machine off before making any adjustments or measurements.
- When using cutting oil, prevent splashing by using appropriate splash guards. Cutting oil on the floor can cause a slippery condition that could result in operator injury.
- Turn knee crank handle backwards when knee elevation is set and not changing
Cutting Speed
The speed of the mill is selected with the Variable Frequency Drive (VFD) mounted to the wall behind the mill. File:HY02D223B.pdf is a PDF of the VFD owner's manual, that may be useful to change the settings for the VFD
To know what speed to run the mill you must know:
- The type of material you are cutting (steel, aluminum, brass, etc)
- The type of cutter you are using (HSS (High Speed Steel) or Carbide)
- The diameter of the cutter
SFM (Surface Feet per Minute)
| Material | HSS | Carbide |
|---|---|---|
| Aluminum | 600 | 800 |
| Brass | 175 | 175 |
| Delrin | 400 | 800 |
| Polycarb | 300 | 500 |
| Stainless Steel | 80 | 300 |
| Steel | 70 | 350 |
Suggested RPM SFPM X 3.82 / Tool Diameter
Example: You are cutting Aluminum with a 3/8" HSS end cutter
600 x 3.82 / 0.375 = 6112 or Set the mill to 6000 RPMS
To Do
Tramming the Vice.
Fixture examples.
Extras
3d printed T-Slot Cleaners, if you would like to make one, or many, for LVL1 link T-Slot Cleaner


