Murphy
[Equipment|Back to list of Equipment]]

|
Contents
General
|
General Info
Murphy is a franken-taz that has been upgraded piece by piece from a stock taz-3. It currently has the Taz 5 hexagon v2 hotend with .5mm nozzle attached. Murphy can handle a variety of materials, but is configured by default for PLA. Murphy requires 3mm filament. Murphy can print from SD card or the Ubuntu workstation to the left.
Because it is not stock, some settings in the firmware are custom. Please exercise caution (or refrain from) when uploading firmware.
Getting Started
Never assume the machine has been left in an ideal state. The machine is available not just to members but to the general public as well.
Kevin's bare minimum workflow before printing:
- Launch Cura
- Load Model
- Verify settings
- Verify Calibration
- Check Filament
- Level Bed
- Check Extrusion
- Verify Filament is Not Crossed
If you have a large or long print to run, it is recommended to run a small calibration cube first to verify that the settings are correct.
Cura
Launch Cura by clicking it's icon in the quick launcher
Print Material Profiles
The TAZ can print a variety of materials, but the two most common are PLA and ABS. PLA is much easier to work with, while ABS is sturdier and more resistant to heat. Murphy is configured to print PLA by default. For printing purposes, PLA uses a lower bed and extruder temperature. Spools should be labeled, but the following video can help you identify unlabeled filament: https://www.youtube.com/watch?v=zqanb6mH-xU
Lulzbot maintains a list of profiles for the taz:
https://www.lulzbot.com/taz-5-cura-profiles
Pre-Print
Following these steps gives you a better chance of success:
Software
1. Load Model
2. Arrange/Manipulate Model Left click on your model to enable options for scaling, resizing, rotating, etc.
Right clicking on your model gives additional more advanced options
3. Verify Settings
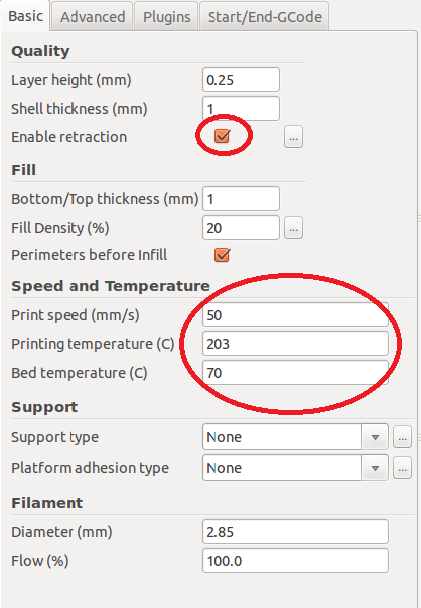
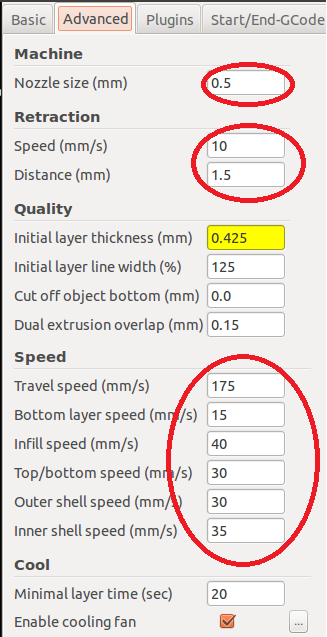
By default a PLA profile should be loaded. If you did not launch Cura yourself, this is not guaranteed. Verify these settings:
4. Launch Control Panel
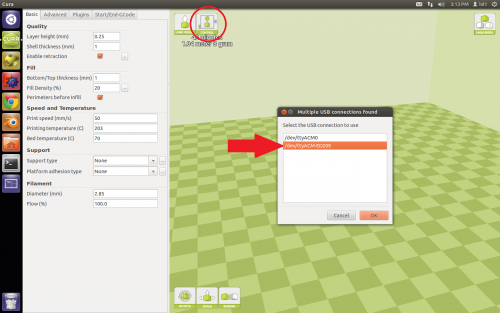
Click the control button at the top of the screen. Make sure to select the correct device in the dialog the follows
Physical Equipment
5. Load Filament 6. Verify Idler Tension 7. Level the Bed
Watch first layer.
Trouble Shooting
It Jammed
Clean Hobbed Bolt
Check Fans
Machine Calibration


